How-To Guides
Port Forwarding Virgin Media Router for Hikvision DVR/NVR
Follow this guide to setup port forwarding on your Virgin Media Super hub. By port forwarding you can use the IVMS application on your computer and phone to remotely access your DVR.
It is important to setup a local static ip address for the DVR. This will ensure that your DVR retains the same IP even after your router is rebooted. From within your DVR, select Configuration > Network and set a static IP for it inside inside your network range. You can do this by unchecking the “Enable DHCP” checkbox on this page and clicking Apply. Note down the IP Address shown in the IPV4 Address. We will be using this in step 4. E.g. 192.168.0.12
Login to your Virgin Media router from your browser. The default address for your router 192.168.0.1

If you have entered the correct address you will be see the Virgin Media Router login page.
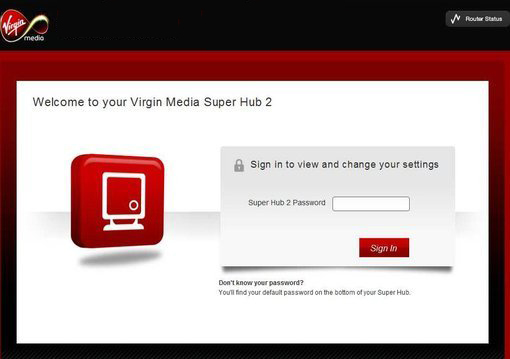
The password can be found on the label on the bottom of your Super Hub under “Settings Password”.
Once logged in you will see the following settings page:
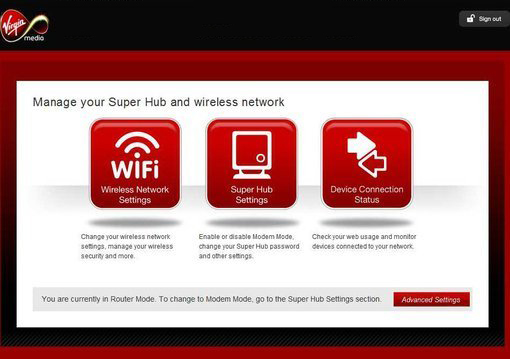
Click the red Advanced Settings button in the lower right corner .
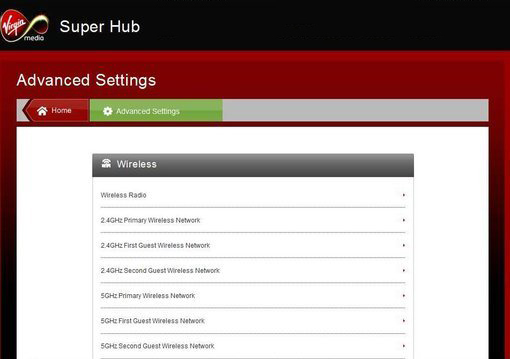
Scroll down and click the Port Forwarding link
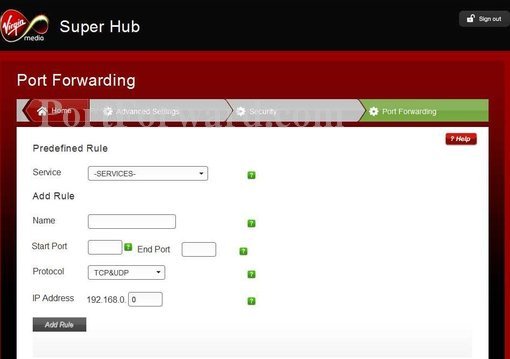
Step 4
This is the page where you enter your port forward information. By default Hikvision uses port 8000 and 554. Tip: You can also forward port 80 (Required for alarm events and to view your DVR from within a browser from outside your network)
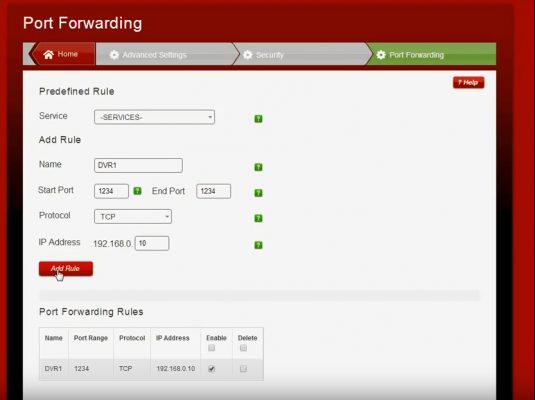
On this page enter the following information
Add Rule
Name: DVR-8000
Start Port: 8000 End Port: 8000
Protocol: TCP
IP Address: 192.168.0.100 (Replace this with the lP address of your DVR as found in step 1)
Then Click Add Rule. Once this rule has been added, Add another rule as follows:
Add Rule
Name: DVR-554
Start Port: 554 End Port: 554
Protocol: TCP
IP Address: 192.168.0.100 (Replace this with the lP address of your DVR as found in step 1)
Congratulations, you have completed port forwarding with Virgin Media Super Hub. If you encounter any difficulties following this guide, feel free to leave a comment below.