How-To
SPRO Remote Mobile Viewing Setup Guide
How to setup remote viewing on the spro dvr/nvr
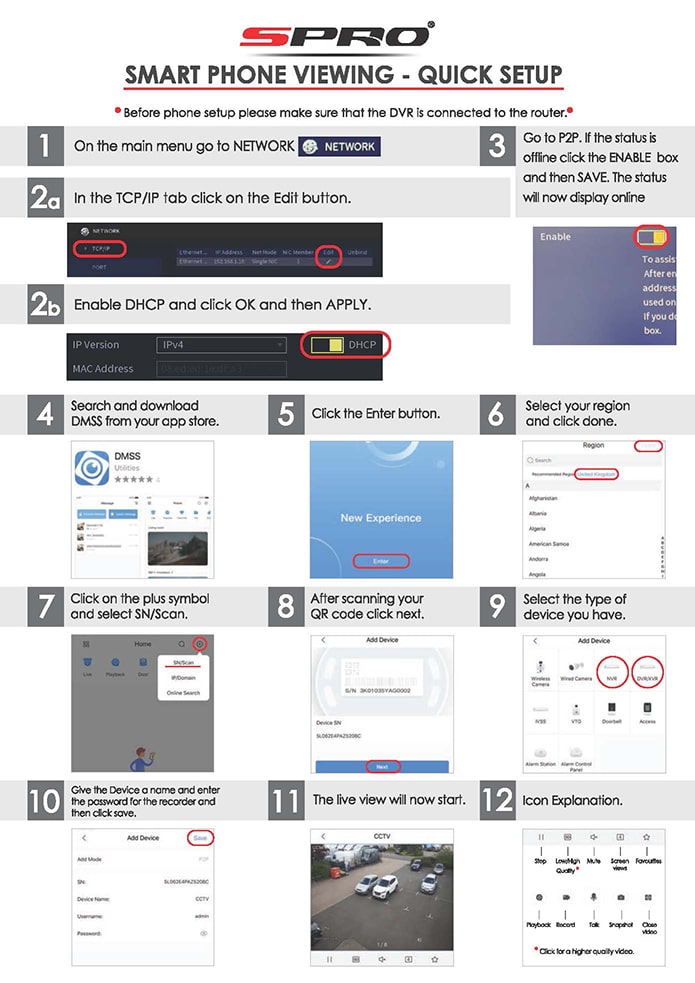
Prepare the DVR/NVR
Before we get started we need to make sure the LAN port of the DVR is connected to your router with an ethernet cable. Once you have the recorder connected to your router, its time to check over the network settings’
Step 1. On your DVR, click on Main Menu and go to NETWORK option
Step 2. In the TCP/IP tab click on the Edit button
Step 3. Enable DHCP and click OK and then APPLY
Step 4. Go to P2P, If the status is offline, click the ENABLE box and then SAVE. The status will now display online and you will see a QR Code which is ready to be scanned by the app.
Proceed to download the app below.
Download the app onto your phone
Search and download DMSS app from the app store or the play store. Once the app is downloaded, select your region until you get into the main app.
Step 1. Once in the app, click on the plus symbol on the top right corner of the screen and select SN/Scan
Step 2. Scan the QR Code displayed on the DVR (Step 4 in the previous section) and click Next
Step 3. Select the type of device you have (usually NVR or DVR)
Step 4. Give the device a name and click the save button on the top right hand corner
The live view will now start from your phone if everything is configured correctly


